
Quickstart: From Agent to chat widget
Use this quickstart to create an Agent, configure its prompt, model, and tools, and embed it as a chat widget on your website.
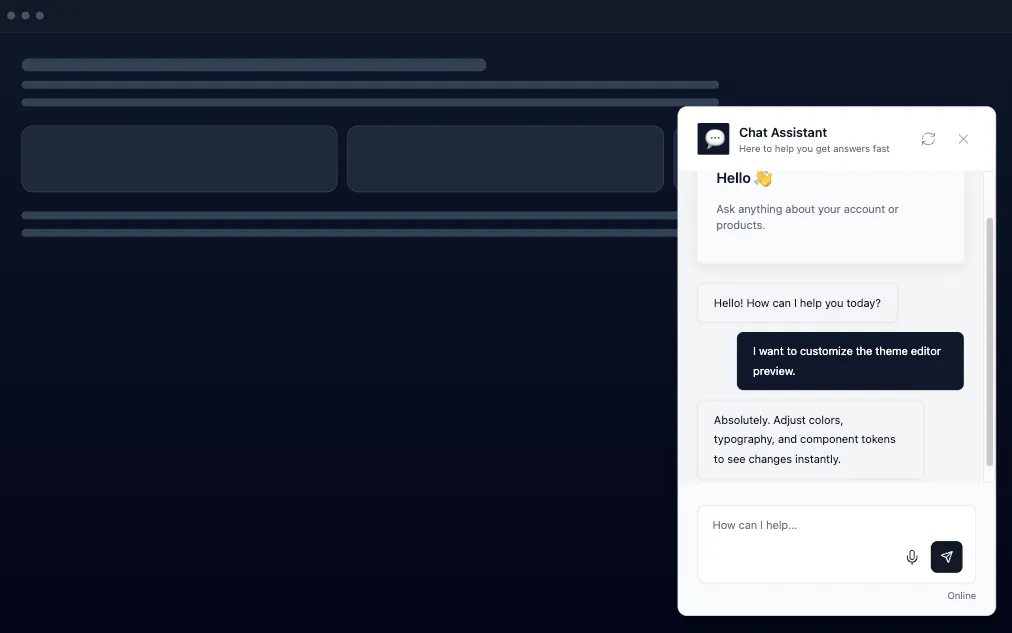
At the end, you have a live chat widget powered by your Agent.
The examples use a website, but you can embed the widget anywhere that supports HTML or React, including a web app, a mobile app webview, an internal tool, or a documentation site.
Before you begin
Create a Runtype account before you start. Use the Runtype sign-up page.
Runtype includes platform keys for a curated selection of models, so you can start without adding provider API keys. For more information, see platform keys.
Create a product
To create a Product with a chat widget, follow these steps:
-
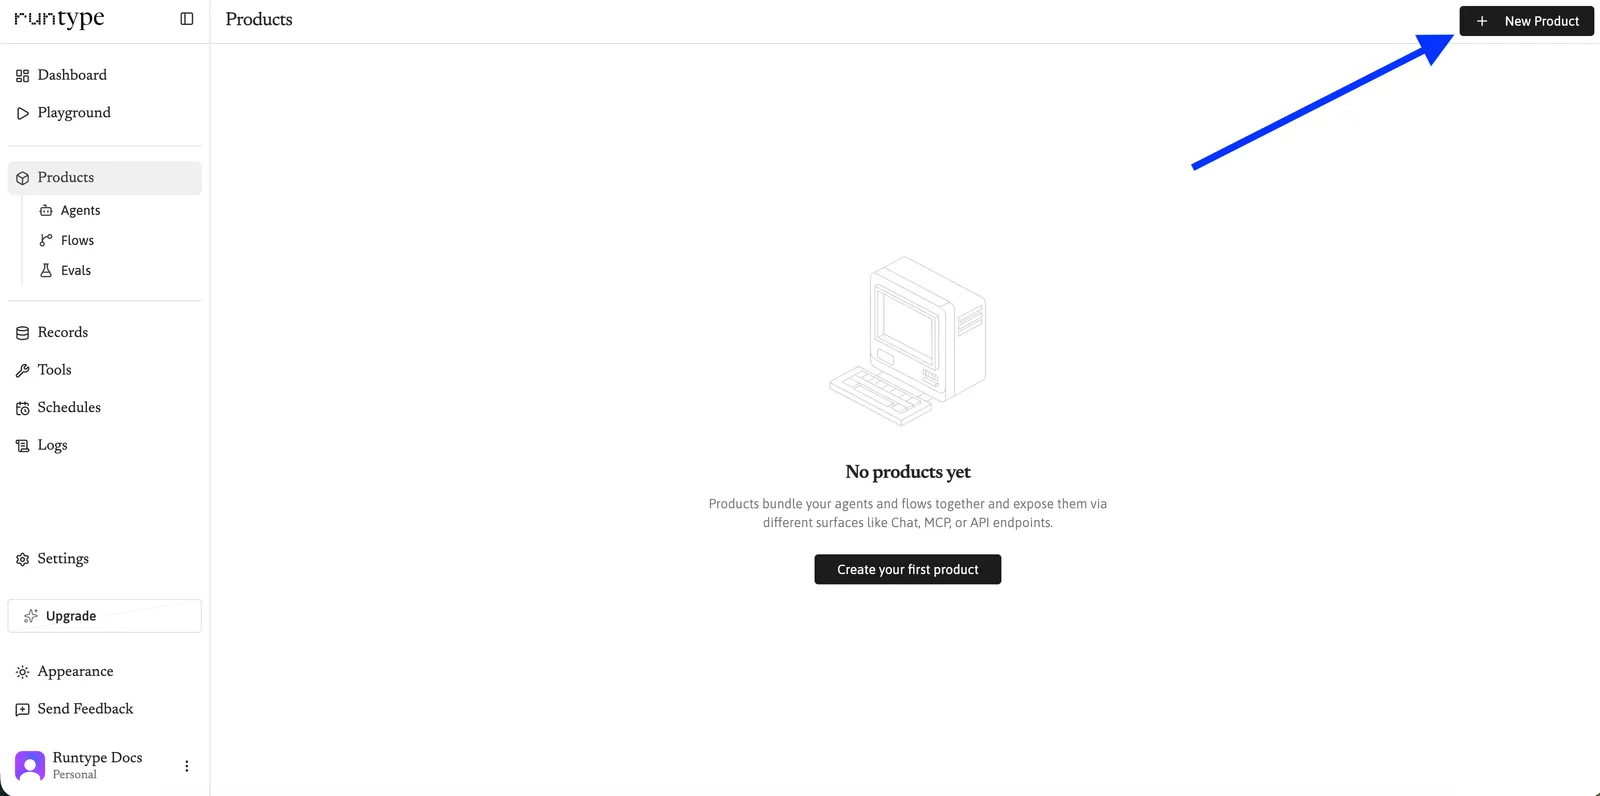
On the Products page, click New product.
-
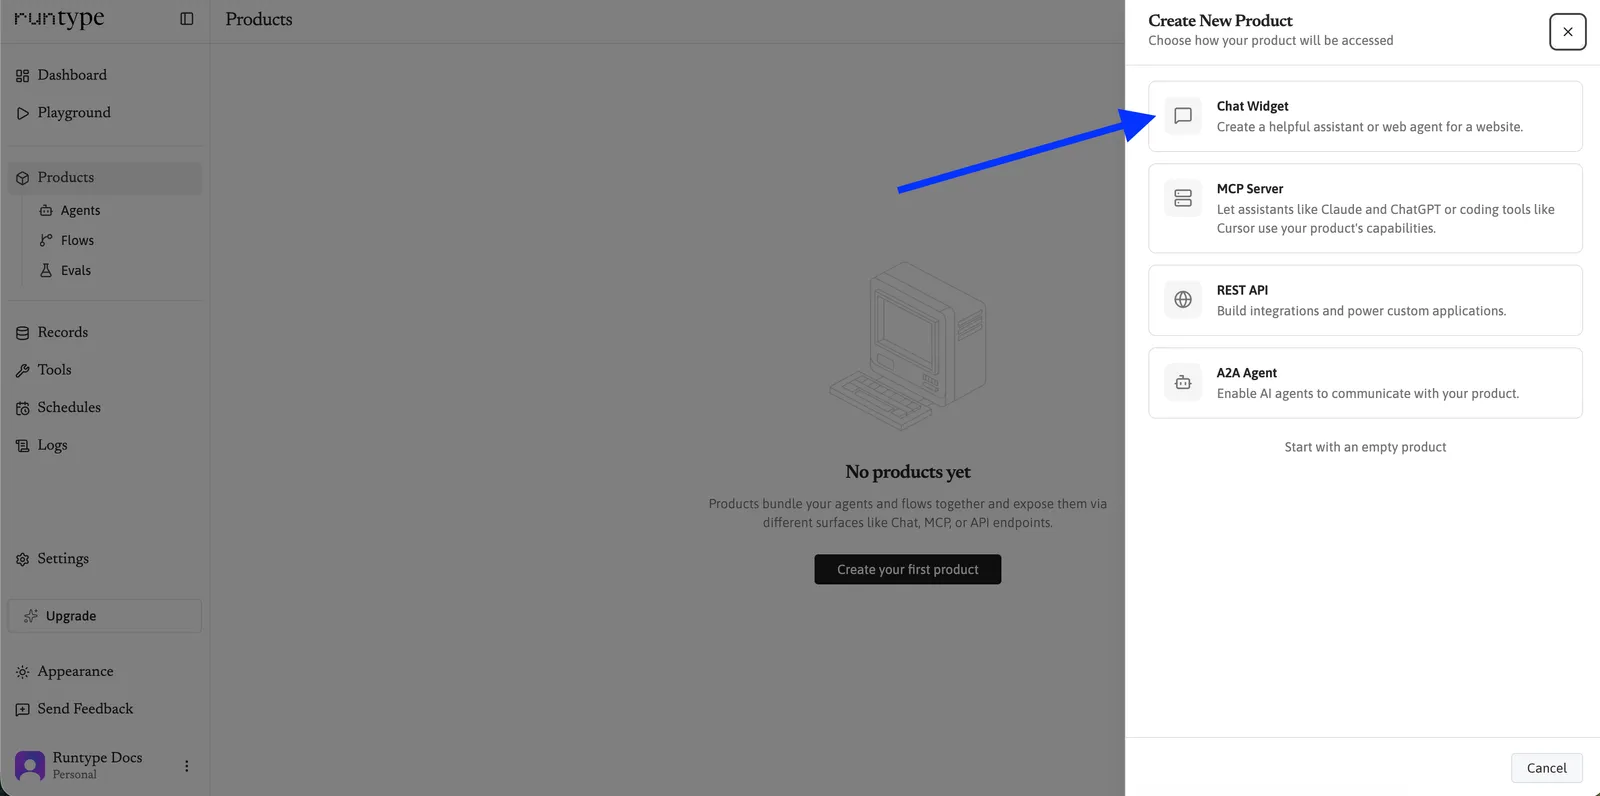
In the create panel, select Chat Widget as the Surface type.
-
In Name, enter a product name.
-
Select New Agent.
-
Click Create Chat Widget. The Product editor opens with the Configure Agent step ready in the Surface panel.
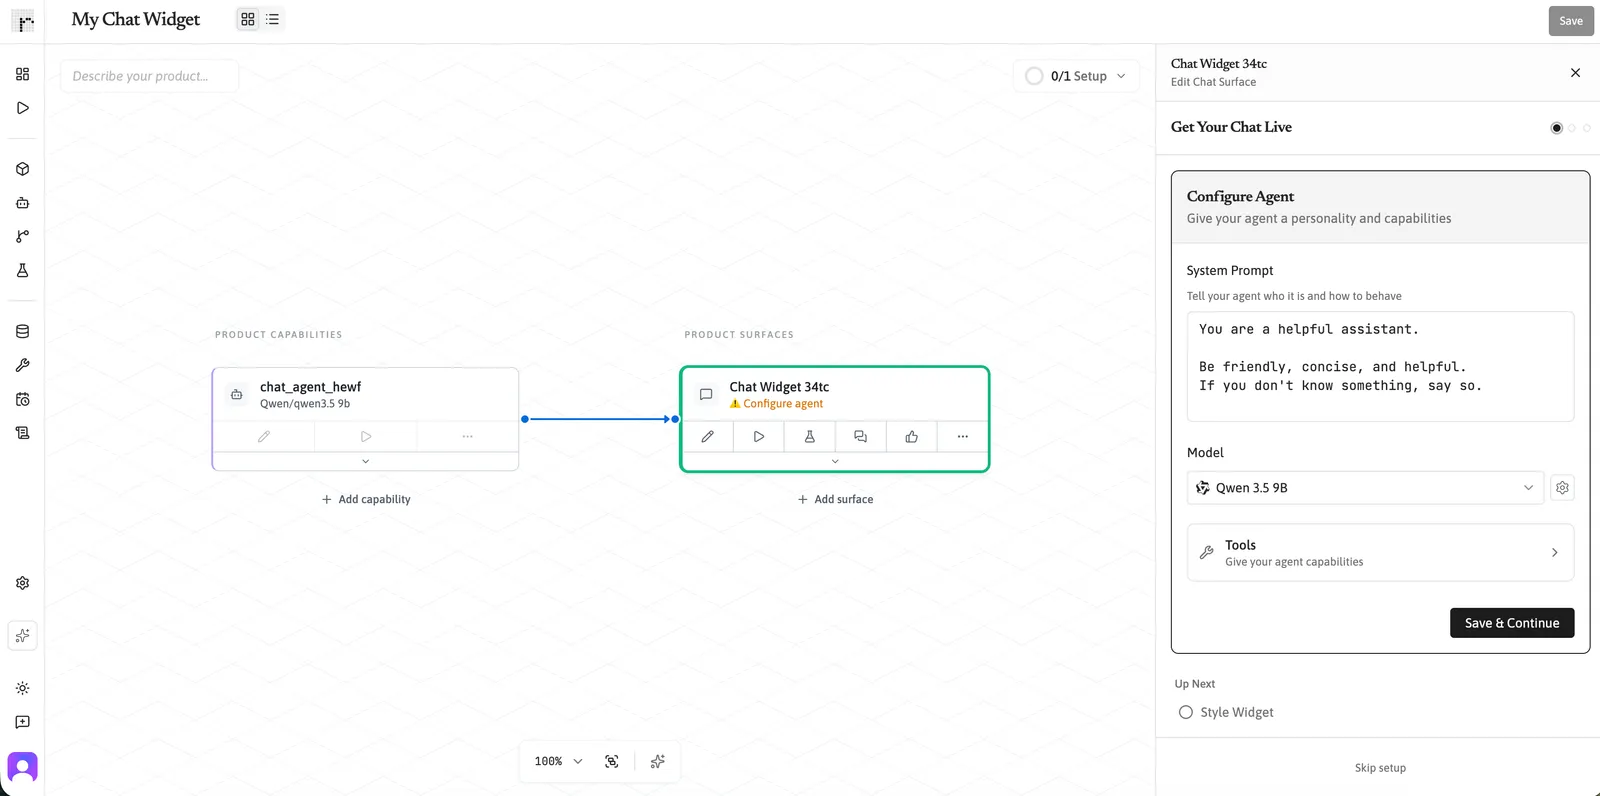
Runtype creates these items:
- A Product: a container for your Capabilities and Surfaces.
- An Agent: a Capability that powers the chat widget. Runtype names it after your Product and gives it the default model and a generic system prompt. For example, a Product named
Acme Supportgets an Agent namedAcme Support Agent. - A Chat Widget Surface: the widget that your users interact with.
The create panel has two other options. Use Existing connects an Agent or Flow that you already have instead of creating one. Skip for now also creates a default Agent for a chat widget.
A Product groups Capabilities and Surfaces. It can expose the same Agent through a chat widget, an API endpoint, or another Surface. For more information, see Creating a Product.
Configure the Agent
The Configure Agent step sets the Agent’s instructions, model, and tools. To configure the Agent, follow these steps:
-
In System Prompt, replace the generic prompt with your instructions. The system prompt controls how the Agent responds. The following sample configures an Agent for product support:
System prompt -
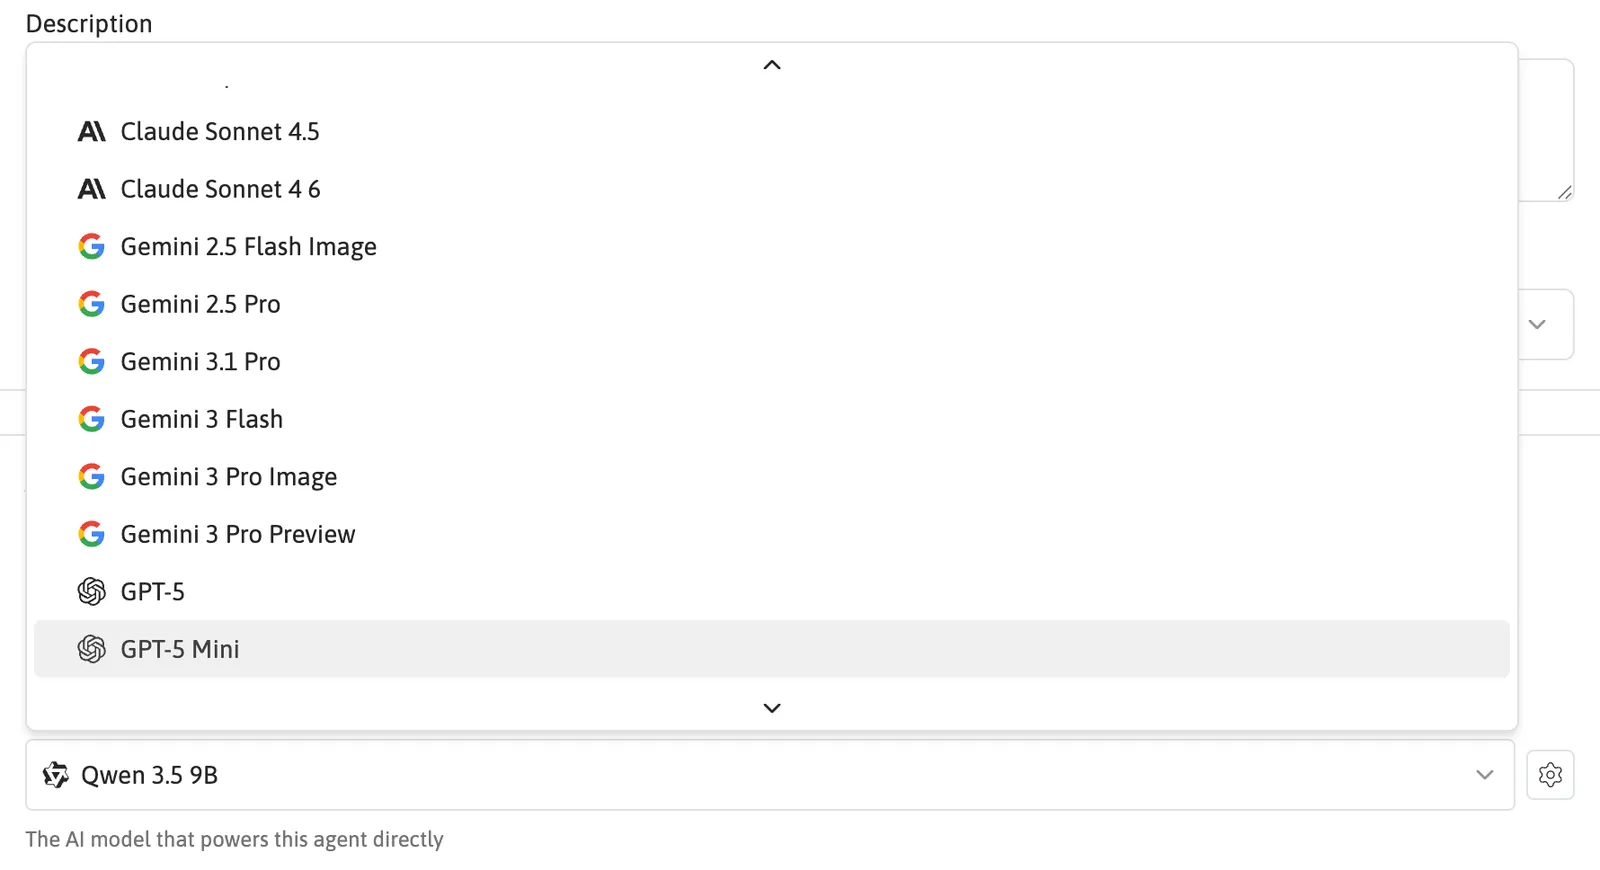
In Model, select the model that powers your Agent. The list shows the models available to your account.
-
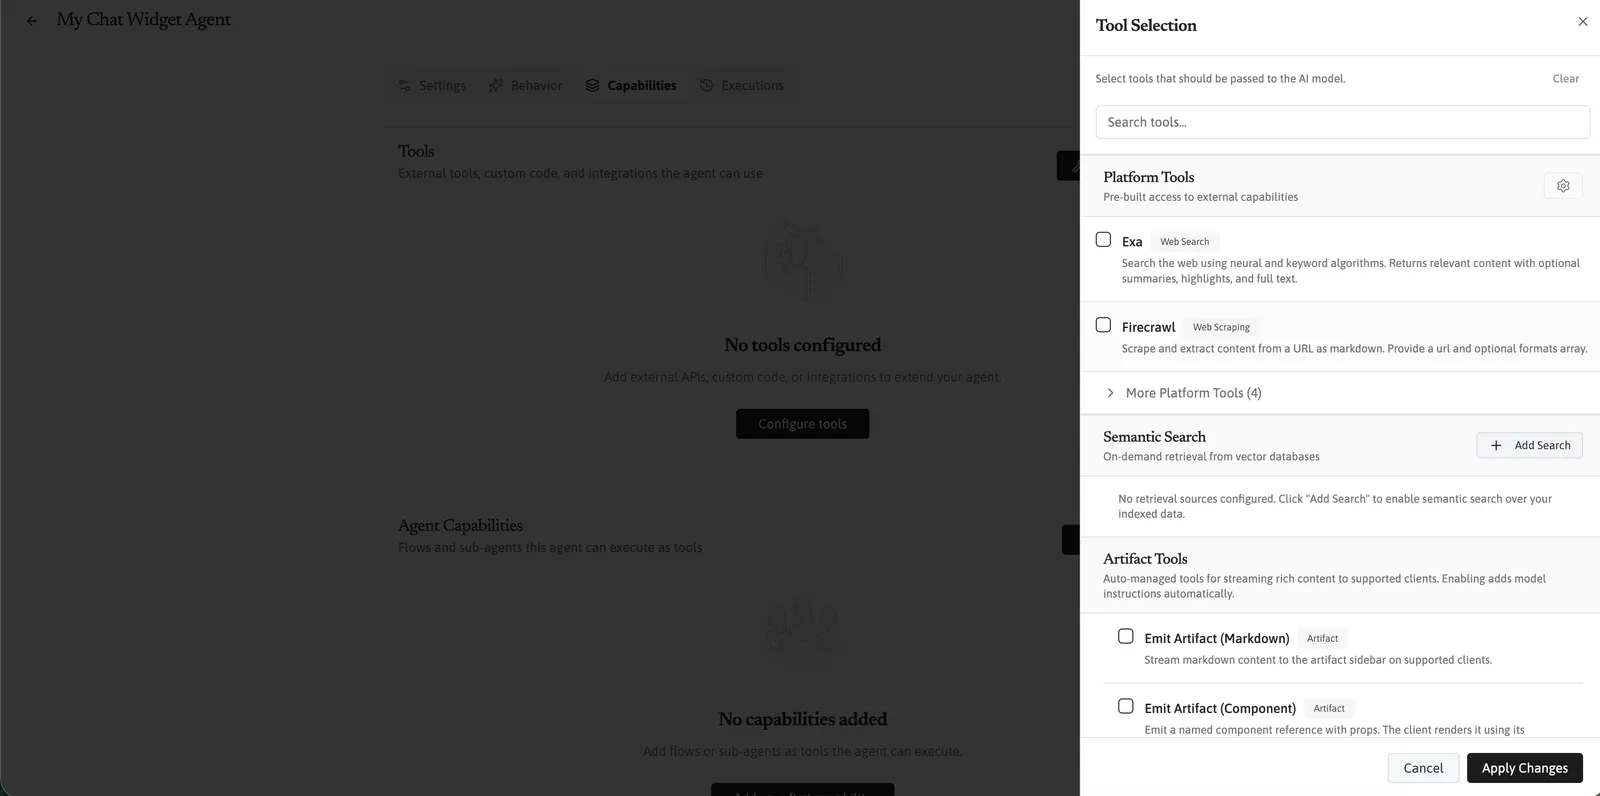
Optional: To let your Agent call external services, click Tools and select the tools that you want. The panel lists platform tools, such as Exa for web search and Firecrawl for web page extraction.
-
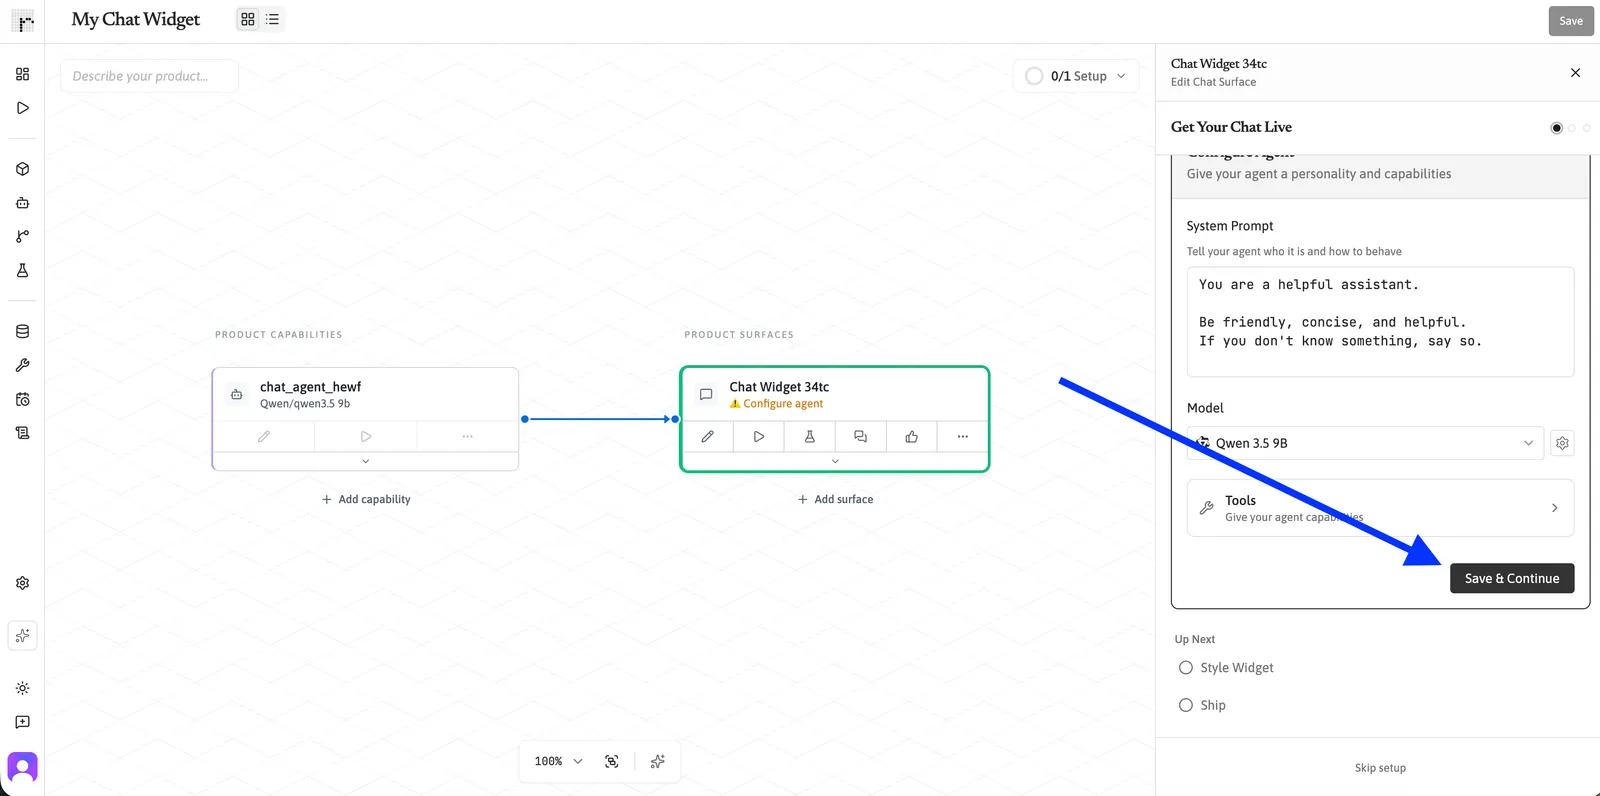
Click Save & Continue. The Style Widget step opens.
For the providers that platform keys cover, see Available AI models. For the full list of platform tools, see Built-in tools.
Style your widget
Choose a theme preset or open Advanced Style Editor to change colors, fonts, and layout.
Use the theme generator in Advanced Style Editor to create a custom theme. Choose one of these sources:
- From a website URL: Enter your website URL. Runtype analyzes the site and uses its colors and design patterns to generate a theme.
- From a description: Enter a plain-language description, such as
dark mode with purple accents. You can also attach reference images.
The editor previews the widget in collapsed, expanded, and fullscreen modes.
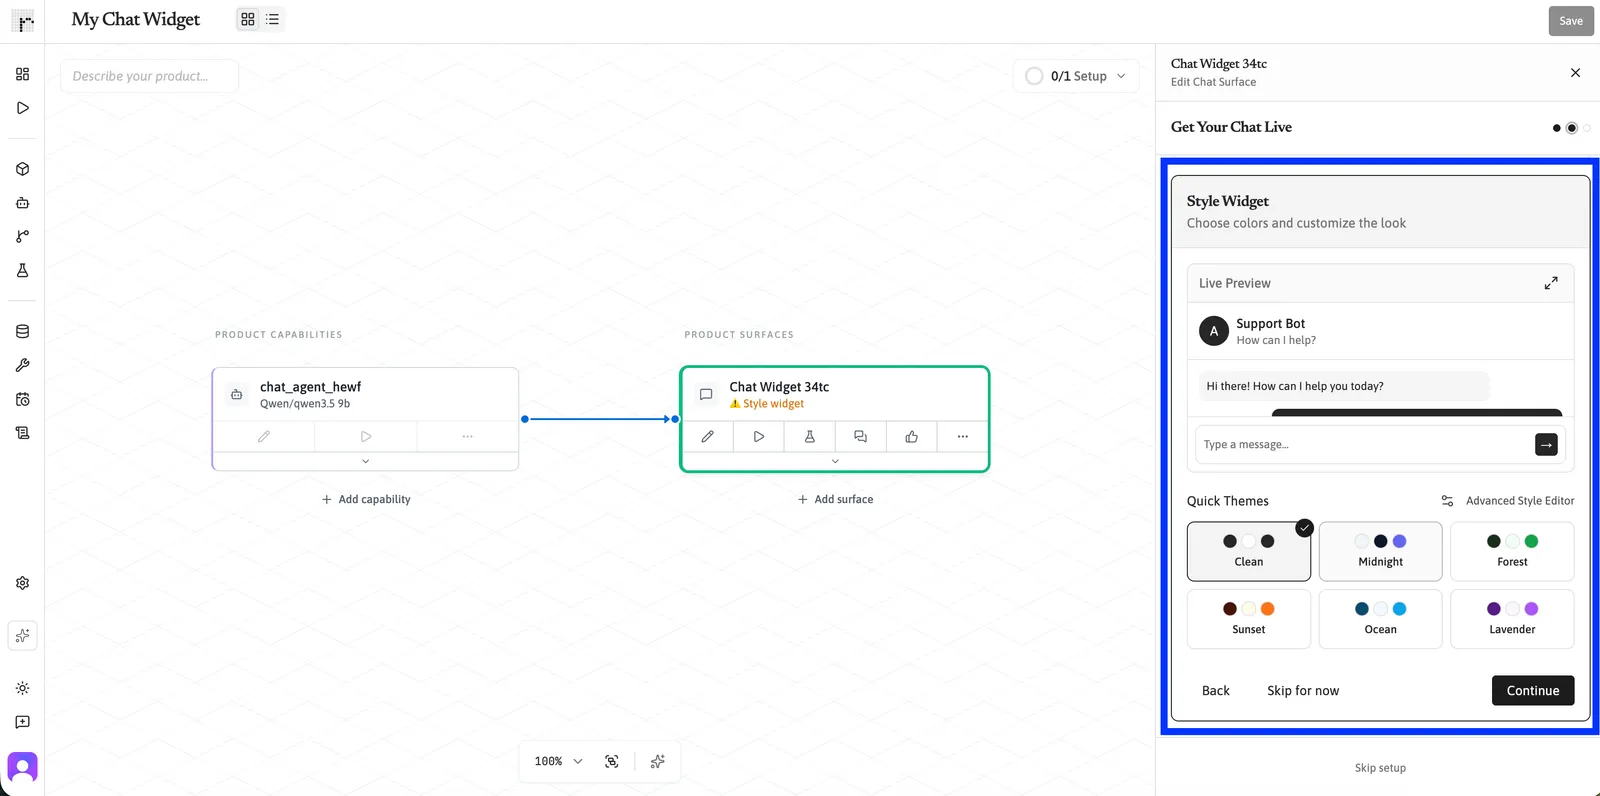
To keep the default theme, click Skip for now. To save your changes and continue, click Continue. The Ship step opens.
Embed the widget on your site
The Ship step shows the embed code for your widget. It reuses an active client token that already covers your Agent, or it creates one. The client token authenticates the widget and limits requests to the Capabilities attached to this Surface. Creating the token also activates the Product and the Surface.
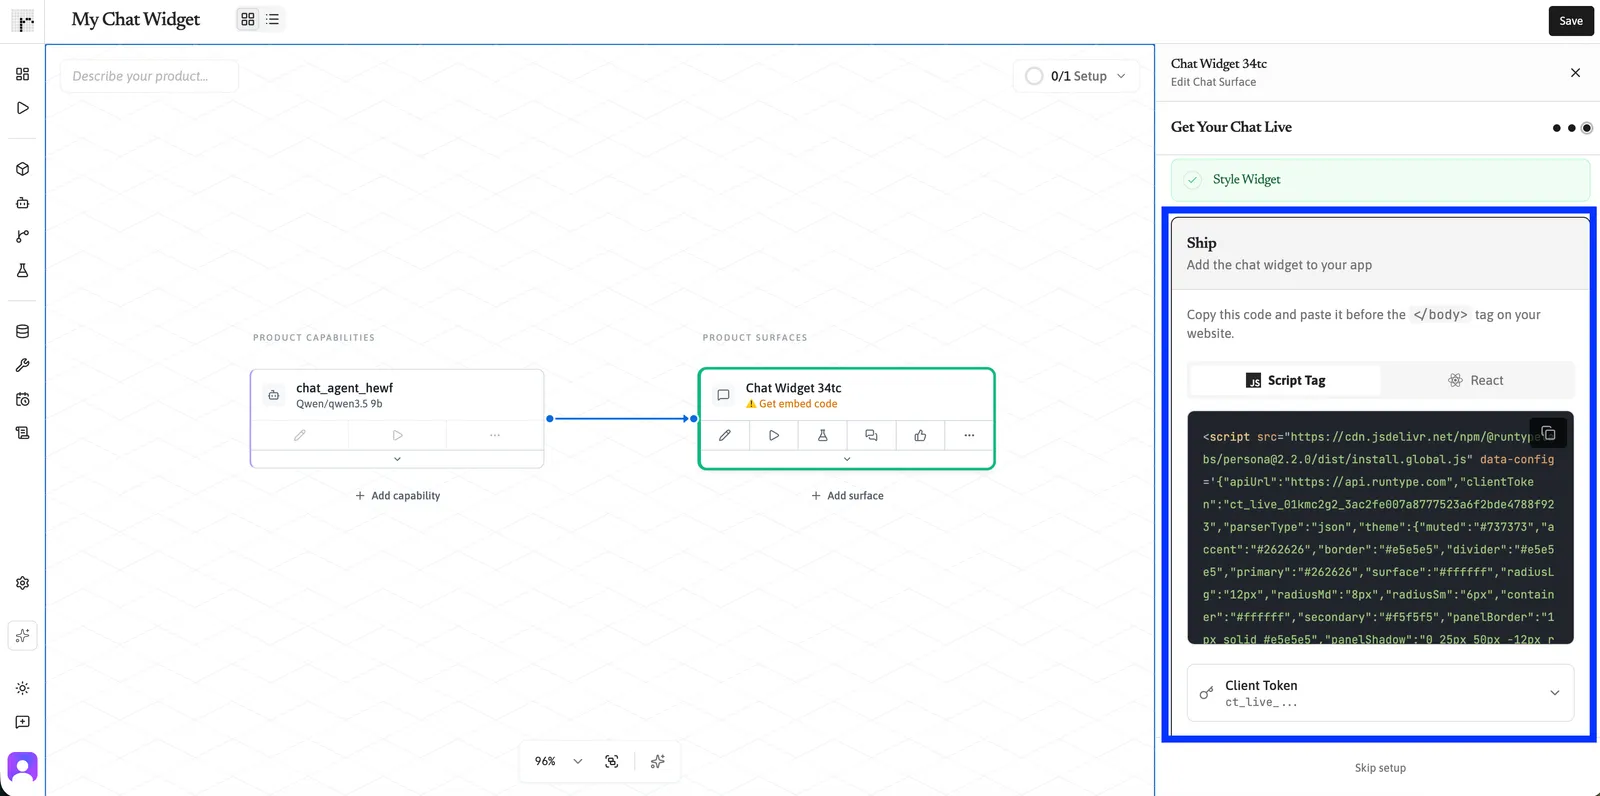
The embed code already contains your client token and the style from the Style Widget step. Paste it unchanged. To embed the widget, follow these steps:
- Select the tab for your site:
- Script Tag: for any HTML page.
- React: for a React or bundler app. Install the widget package first with
npm install @runtypelabs/persona.
- Copy the embed code. It already turns on the V5 defaults (
future: { v5Defaults: true }). - Paste the code into your site. For a script tag, paste it before the closing
</body>tag. With the V5 defaults, the launcher appears in the bottom-right corner of your site as a round button. - Select the I’ve added this to my app checkbox.
- Click Complete Setup.
To find the embed code later, open the Surface and select the Ship tab.
The token that the Ship step creates is a live token that accepts requests from any origin (*). This lets you test the widget on any site, including localhost. Before production, replace * with your site’s origins. For more information, see Set allowed origins.
Test the widget
To test the widget, send a message in the widget on your site. The Agent responds according to the system prompt.
To test from the dashboard instead, open the Product editor, open the actions menu on the Chat Widget Surface, and click Preview.
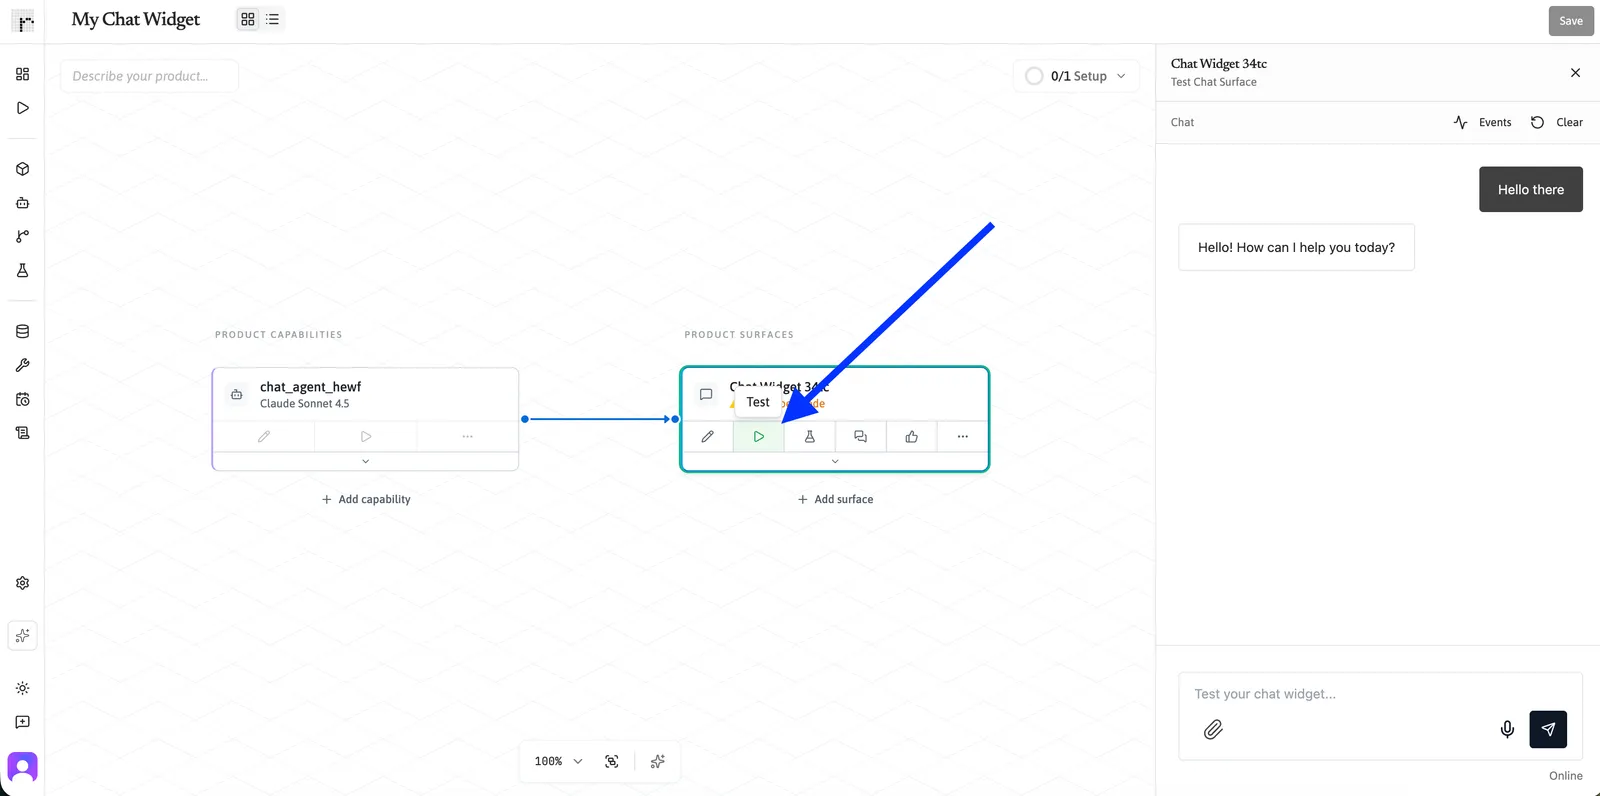
To change the response, return to the Product editor and open the Agent Capability. Edit the system prompt, model, or tools. To inspect execution details, open What are Logs?.
Troubleshoot the widget
The following problems are the most common when you embed a widget for the first time:
- The request fails with
Origin not allowed: Your site’s origin is not in the token’s allowed origins, or not in the Surface’s allowed origins. Add the exact origin, including the scheme and port, to the token. If the Surface has its own allowed origins, add the origin there too. - The request fails with a rate limit or
Session message limit reached: A new token accepts 10 requests per minute, 100 per hour, and 100 messages per session. Wait and send the message again, start a new chat session, or raise the limits on the token. - The Ship step says that no capabilities are connected: The Surface has no Agent or Flow. Click Add Capability, connect one, and then click Check Again.
For more fixes, see Troubleshoot rejected requests.
Build the widget from code
You can build the same widget without the dashboard. Define the Agent in your repository, create or update it with the SDK, create a client token for it, and pass the token and the Agent ID to the widget. This path does not need a Product or a Surface.
Before you run the script, do the following:
- Install the SDK in your project with
npm install @runtypelabs/sdk. - Create a Runtype API key. For more information, see Managing API keys.
The following script creates or updates the Agent and its client token:
Run the script with your API key:
Replace YOUR_API_KEY with your Runtype API key. Run the script from your deploy pipeline to keep the Agent and token in sync with your repository.
Each ensure call finds the existing Agent or token by name and updates it, so you can run the script on every deploy. ensure returns a plan only in dry-run mode, so in a normal run the plan checks narrow the result type for TypeScript. The token check throws if a token with this name already exists and its value can no longer be displayed, such as a live token that you created in the dashboard. In that case, give the token a different name in the script. deploy: { alias: 'live' } makes the widget run each new definition. For what happens without it, see Target a version or release alias. For the token options, see Create a token from code.
The script creates a live token that accepts requests only from https://docs.example.com. To test on your computer, add your local origin, such as http://localhost:3000, to allowedOrigins.
Pass the two printed values to the widget. With the npm package:
With a script tag, the data-config attribute turns on the V5 defaults:
Replace the following:
YOUR_CLIENT_TOKEN: theclientTokenvalue that the script prints.YOUR_AGENT_ID: theagentIdvalue that the script prints.
The client token is public, so you can commit it to your site’s configuration. The API key stays in your deploy pipeline.
Next steps
Use these links to continue customizing and evaluating your widget:
- Creating and configuring Agents: add tools and capabilities to your Agent
- Embedding the chat widget (script tag): configure the script tag installer
- Embedding the chat widget (React): add the widget to a React app
- Runtime tools: extend the widget with server-side and browser tools
- Conversation history in an embedded widget: keep conversations across page loads
- Client tokens and domain restrictions: restrict the widget to approved origins
- Widget theming and customization: refine the widget’s appearance and behavior
- Running an Eval: compare prompts and models against test data